9. Data persistence
In most Web apps some of the data is persistent data which is needs to be stored. When creating a web application the developers need to choose where the data used by the application is stored.
Data can be stored:
- on the front-end - locally on the machine the user is running their browser on
- on the back-end - usually separate database servers
- or likely both
Font-end data storage
The recommended way of storing data on the client side (the front-end) is by using the Web Storage API. It is a part of WHATWG's HTML Living standard. Mozilla Developer Network, once again, provides a good starting point for exploration.
The parts of the Web Storage API we are interested in are the Storage interface, Local Storage, and Session Storage.
| Extra: WHATWG - Web Storage API
| Extra: Mozilla Developer Network - Web Storage API
Storage interface
Storage interface defines methods for adding and modifying key-value pairs in the storage, as well as clearing the storage. There is also a length attribute which tells the number of key-value pairs that are currently stored in the storage.
In key-value pairs, both key and value are strings. Value string may contain data structures, which need to be parsed from strings. JSON.stringify() and JSON.parse() can be used to "encode" and "decode" JSON objects to and from string.
The Storage interface is suitable for relatively small amounts of data. Further, different browsers have different limits for the amount of data.
Storage interface methods setItem(), removeItem(), and clear() trigger a storage event, which tells the browsers that the stored data has changed.
| Extra: W3 - The Storage interface
| Extra: WHATWG - The storage event interface
Session storage and Local storage
Storage objects have an associated type, which is either "local" for Local storage or "session" for Session storage.
Session storage and Local storage objects are created per host and per protocol. For example origins http://tuni.fi and https://tuni.fi will have separate Local storage objects and Session storage objects.
[Session storage] is designed for scenarios where the user is carrying out a single transaction, but could be carrying out multiple transactions in different windows at the same time.
To address this, this specification introduces the sessionStorage getter. Sites can add data to the session storage, and it will be accessible to any page from the same site opened in that window.
Session storage data is available for the same origin pages in one browser tab, meant to replace session cookies. Session storage is cleared after the browser closes, or it can be cleared by the user at any time.
[Local storage] is designed for storage that spans multiple windows, and lasts beyond the current session. In particular, web applications might wish to store megabytes of user data, such as entire user-authored documents or a user's mailbox, on the client side for performance reasons.
The localStorage getter is used to access a page's local storage area.
Local Storage data is shared to all tabs and windows from the same origin. Local storage persists over browsing sessions, but can be cleared by user at any time.
| Session storage | Local storage |
|---|---|
| Data is available for the same origin pages in one browser tab | Data is shared to all tabs and windows from the same origin |
| Data is cleared after the browser closes | Data is persisted over browsing sessions |
| Meant for replacing cookies | Meant for storing larger amounts of data |
Storages and dev tools
Local storage and Session storage are properties of the Window, so in browser's dev tools Console running either window.localStorage or window.sessionStorage will return the Storage objects.
- Firefox DevTools: Storage tab
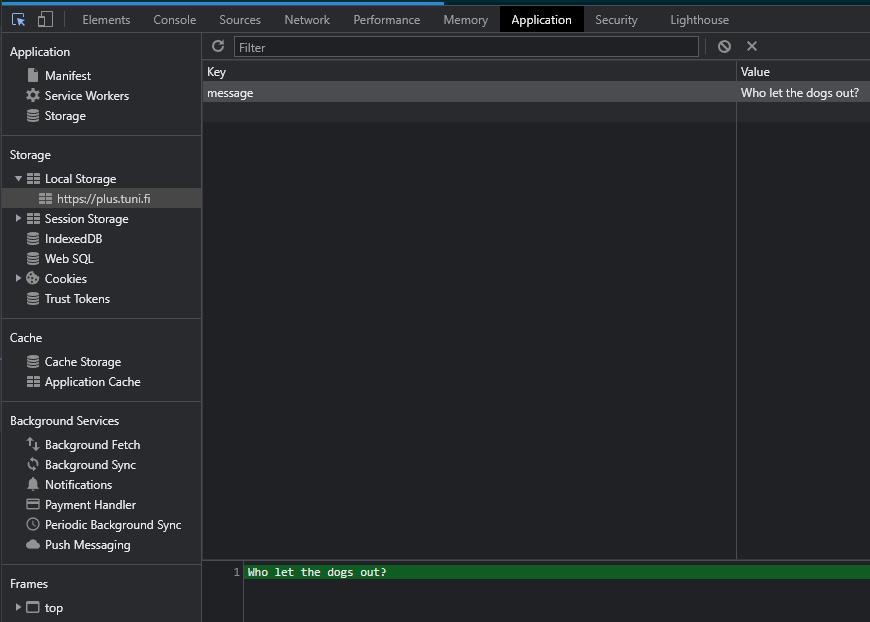
- Chrome DevTools: Application tab, on the left side panel under Storage
Chrome DevTools tutorial for exploring Local storage can be applied to Session storage, too.
So, running in the browsers console this command:

... will result in data being stored in the local storage:
// Set data in local storage
window.localStorage.setItem("my-key", "my-value");

// Check the length
if(window.localStorage.length > 0) {

    // prints "my-value"
    console.log(window.localStorage.getItem("my-key"));

    // Remove specific item
    window.localStorage.removeItem("my-key");

    // prints undefined
    console.log(window.localStorage.getItem("my-key"));
}

// Remove all items
window.localStorage.clear();
Other Local storage options
Session storage and Local storage work for their inteded purposes, but have downsides, like synchronicity. For storing large amounts of structured data on the frontside Mozilla Developer Network suggests using IndexedDB, and Storage for the web.
| Extra: Mozilla Developer Network - IndexedDB
| Extra: W3C - IndexedDB
| Extra: Web.dev - Storage for the web
Cache API is recommended for storing smaller request/response related data.
| Extra: W3C - Cache API
Go ahead and try them all, they're free! 
Back-end data storage
There are many options for back-end data storage. If you have as backend something like PHP, Python, or ASP.NET, you have drivers for many (or perhaps most) relational and document databases. While Node.js can be used with MySQL, for example, it seems to be much more common to use mongoDB instead. And there is a good reason behind that, as well. Unlike MySQL or PostgreSQL, mongoDB does not use SQL at all (hence the term NoSQL). In fact, it is not a relational database either, but a document database.
A document-based database is quite different from a relational database. Let's illustrate this with a simple example dataset with both paradigms.
For example, let's say we have some users, who can have zero or more hobbies and they co-write zero or more blogs.
Let's start with a relational SQL table since that might be more familiar to you. We can write three tables: user, hobby, and blog. To keep it simple, we can get away with just using one-to-many type of relations.
User
| Id | Name | Address |
|---|---|---|
| 1 | Brandon Walsh | 7 Alden Drive, 90210, LA |
Hobby
| Id | User_id | Name |
|---|---|---|
| 1 | 1 | Altruism |
| 2 | 1 | Good morals |
| 3 | 1 | Producing |
Blog
| Id | User_id | Name | URL |
|---|---|---|---|
| 1 | 1 | The Bewerly Beat | ... |
| 2 | 1 | The Jet Set | ... |
A relational database consists of tables with rows of data. These rows can be linked to rows in other tables by using keys. If we were to query this data and use it in some web application, we might want to be able to present all of this information related to a given user at the same time. So, we might want to end up with a JSON object such as this:
{
    "id": 1,
    "name": "Brandon Walsh",
    "address": "7 Alden Drive, 90210, LA",
    "hobbies": [
        "Altruism",
        "Good morals",
        "Producing"
    ],
    "blogs": [
        {
            "name": "The Bewerly Beat",
            "URL": "...",
        },
        {
            "name": "The Jet Set",
            "url": "..."
        }
    ]
}
How a document-based database differs from a relational one is by not needing to make that conversion between a structured data object and table rows. In fact, you can just push this JSON object into a document-based database and retrieve it back without ever breaking it into tables and rows. This is why document-based databases, such as mongoDB, have become so popular especially when working with JavaScript.
Warning
In the example above, I added subjects, such as the blogs, as part of the user model. Here lies a danger: most models can be justifiably attached as part of the user model - a store where the user works, a tram line the user takes to go to work, etc. This can lead to massive objects, where all data is accessed through some user instance. This is not ideal.
You should keep the documents relatively succinct to avoid this. This happens somewhat organicly when we move to microservice architecture and split application responsibilities to small, contained units, but that is a topic for another course.
mongoDB
mongoDB is a document-based free and open-source NoSQL database. On Mongo servers, users can create databases, and collections in these databases. Collections hold flexible, JSON-like documents. And this is the sparkle in Node.js  mongoDB love story - not having to move data from JSON object to rows on relational database and back. Instead, you can just offer JSON to the database as is.
There is no pre-defined schema like with relational databases. Instead, fields in the documents can vary from document to document, and data structure in each document change over time. Document model maps to the objects in your application code. It's all JSON-like, baby!
mongoDB is a popular solution with Node, and we will be using mongoDB as the database in the groupwork.
NoSQL
Common charasteristics of NoSQL databases:
- designed for large volumes of rapidly changing data without a set schema
- scale well, can run in distributed clusters
- distributed databases so you choose at most two out of: consistent, available, partition tolerant
Some NoSQL database categories (and examples):
| Extra: Martin Fowler - NoSQL Definition
| Extra: mongoDB - NoSQL explained
Using mongoDB and Mongo shell
mongoDB server runs as a service. Start it with sudo service mongod start. This service should run by default in your Vagrant VM.
mongo shell provides a CLI for interacting with the mongoDB server using JavaScript.
A mongo shell example of creating a new database myPetDatabase, inserting a document to the database's cats collection, and querying JSON documents from the collection:
> use myPetDatabase
switched to db myPetDatabase

> db.cats.insertOne({ name: "Fluffy" });
{
    "acknowledged" : true,
    "insertedId" : ObjectId("619cd5a82f43dfe94936a33d")
}

> db.cats.find();
{ "_id" : ObjectId("619cd5a82f43dfe94936a33d"), "name" : "Fluffy" }

> db.cats.find().forEach(data => print (data.name));
Fluffy

> db.cats.insertOne({name:"Percy"});
{
    "acknowledged" : true,
    "insertedId" : ObjectId("619cd9232f43dfe94936a33e")
}

> db.cats.find();
{ "_id" : ObjectId("619cd5a82f43dfe94936a33d"), "name" : "Fluffy" }
{ "_id" : ObjectId("619cd9232f43dfe94936a33e"), "name" : "Percy" }

> db.cats.find(ObjectId("619cd9232f43dfe94936a33e"));
{ "_id" : ObjectId("619cd9232f43dfe94936a33e"), "name" : "Percy" }
As you can see, working with mongoDB can be fast and loose. There is no schema and new collections can be accidentally created by simply typoing the name on the shell. With SQL you can set up constraints. You can specify that a certain field is required, you can force the datatype of fields, you can check for uniqueness, etc. Even without constraints, if you want to add new fields to your data model, you have to alter the table first to accommodate it. With mongoDB you have a lot more flexibility. You can add new fields just by writing that data. But you also have a much greater responsibility - you cannot assume your data contains some field or that some field is of a certain data type. You have to handle these outside the database.
But the situation is not dire - we'll soon start bringing back a schema with an ORM
Insert IDs
With relational databases, you might be familiar with specifying an id field for each row. With mongoDB, an _id field will be automatically created and populated with an ObjectId, such as with Fluffy the cat: { "_id" : ObjectId("619cd5a82f43dfe94936a33d"), "name" : "Fluffy" }. If you want to be in charge of the ids, you have to specify such in the data:
> db.test.insertOne({_id: 1, name: "test"});
{ "acknowledged" : true, "insertedId" : 1 }

> db.test.find();
{ "_id" : 1, "name" : "test" }

> db.test.insertOne({_id: 1, name: "test 2"});
WriteError({
    "index" : 0,
    "code" : 11000,
    "errmsg" : "E11000 duplicate key error collection: myNewDatabase.test index: _id_ dup key: { _id: 1.0 }",
    "op" : {
        "_id" : 1,
        "name" : "test 2"
    }
})

> db.test.find();
{ "_id" : 1, "name" : "test" }
The basic CRUD operations (Create, Read, Update, Delete) are handeled with the insertOne() and insertMany(), find(), updateOne(), updateMany() and replaceOne(), deleteOne() and deleteMany() commands. But the real power lies behind what you can give these commands as arguments. For example, with find(), we can add query criteria and cursor modifiers:
db.cats.find(
    { gender: "m", age: { $gt: 2 } },
).limit(2)
As SQL, this might look something like this:
SELECT * FROM cats WHERE gender = "m" AND age > 2 LIMIT 2;
We can use the filters for updates and deletes, as well. Let's say we want to modify our collection of cats and add a type of kitten to all cats that are less than 1 years old:
db.cats.updateMany(
    { age: { $lt: 1 } },
    { $set : { type: "kitten" } }
)
For deletes, a filter could look like this:
db.cats.deleteMany(
    { type: "deceased" }
)
mongoDB Node.js driver
The official mongoDB driver for Node.js provides a high-level API for Mongo for use in your Node.js code.
Install with:
npm install mongodb
A connection URI is needed to instruct the driver on how to connect to a mongoDB deployment.

The code below is from the mongoDB documentation illustrating connecting to a mongoDB database using Node.js:
const { MongoClient } = require("mongodb");

// Connection URI
const uri =
  "mongodb+srv://sample-hostname:27017/?poolSize=20&writeConcern=majority";

// Create a new MongoClient
const client = new MongoClient(uri);

async function run() {
    try {
        // Connect the client to the server
        await client.connect();

        // Establish and verify connection
        await client.db("admin").command({ ping: 1 });
        console.log("Connected successfully to server");
    } finally {
        // Ensures that the client will close when you finish/error
        await client.close();
    }
}
run().catch(console.dir);
| Extra: mongoDB - Connection Guide
For local development, however, the connection URI can be much more simple: we can get away with just const uri = "mongodb://localhost:27017";.
I've now used use myPetDatabase in mongo shell, client.db("admin") in Node.js code, and mongodb://localhost:27017 as connection URI. If I don't specify a database name (as in the connection URI scenario), a database with a random name will be created automatically. A named database can be created and switched to with any of these methods:
use myPetDatabasein mongo shell,client.db("myPetDatabase")in Node.js code, andmongodb://localhost:27017/myPetDatabasein connection URI
While playing around, you can use the automatically created database, but for any serious coding always use a named database, or you might find it difficult to find your data on the next run.
Inserting a single record to a mongoDB database is quite simple:
// define the JavaScript object
const americana = {
    name: "Americana",
    toppings: ["ham", "pineapple", "blue cheese"],
    price: 700
};

// attempt insert
const result = await collection.insertOne(americana);

// insert operation returns also the _id for the new record
console.log("Done with _id: " + result.insertId);
price: 700?
When working with prices, it might sometimes be easier to store values in cents and not worry about decimal data types. So, 700 instead of 7.00. Makes calculations easier; just remember it when rendering values to the UI.
Here's an example for inserting multiple items in one go when a server receives a request:
const { MongoClient } = require("mongodb");
const http = require('http');
const uri = "mongodb://localhost:27017";
const client = new MongoClient(uri);

// this function will handle all mongoDB tasks
async function run(data) {
    try {
        await client.connect();
        const database = client.db("animals");
        const collection = database.collection("mammals");
        const result = await collection.insertMany(data, {});
    }
    catch (e) {
        console.error(`${e}:  connection failed.`);
    }
}

// plain Node.js server
const server = http.createServer();

server.on('request', async (req, res) => {

    // remember, no schema
    const species = [
        { "species": "dog", "legs": 4 },
        { "species": "whale" },
        { "no": "schema" }
    ];

    await run(species);

    res.end("... and we are done!");
});

server.listen(3000);
Once we have data in our database, we can proceed to create a server that returns the data to clients:
const { MongoClient } = require("mongodb");
const http = require('http');
const uri = "mongodb://localhost:27017";
const client = new MongoClient(uri);

// this function will handle all mongoDB tasks
async function run() {
    try {
        await client.connect();
        const database = client.db("animals");
        const collection = database.collection("mammals");
        return await collection.find({}).toArray();
    }
    catch (e) {
        console.error(`${e}:  connection failed.`);
    }
}

// plain Node.js server
const server = http.createServer();

server.on('request', async (req, res) => {

    const data = await run();

    res.end(JSON.stringify(data));
});

server.listen(3000);
GUI tools for connecting to mongoDB
These tools are not installed by default, but you can try them
- MongDB Compass https://www.mongodb.com/products/compass
- Robo 3T https://robomongo.org/
To get mongo to accept connections from all hosts, modify /etc/mongod.conf (e.g., sudo vim /etc/mongod.conf) and change, for example, bindIp: 0.0.0.0 and run sudo service mongod restart). This should have been done for you already in our Vagrant VM.
Interacting with a database
There are two approaches to interacting with a database:
- Using the databases' native query language (e.g., SQL)
- Using an Object-Document Mapping ("ODM") / Object-Relational Mapping ("ORM").
An ODM/ORM represents the website's data as JavaScript objects, which are then mapped to the underlying database. Some ORMs are tied to a specific database while others provide a database-agnostic back-end.
The very best performance can be gained by using whatever query language is supported by the database.
ORM's are often slower because they use translation code to map between objects and the database format, which may not use the most efficient database queries. Using an ORM, programmers can continue to think in terms of JavaScript objects rather than database semantics. This is particularly true if you need to work with different databases. They also provide an obvious place to perform validation and checking of data.
Using ODM/ORMs often results in lower costs for development and maintenance! Unless you are very familiar with the native query language or performance is paramount, you should strongly consider using an ORM.
A common pro mentioned when advocating ORMs is the easiness to change the underlying database implementation without changing the business logic. However, in my experience, it is uncommon to change the database implementation often.
To illustrate the use of an ORM, let's look at some code. Let's imagine we have some controller methods for various CRUD operations:
const Post = require('./models/Post');

// Returns all blog posts as JSON
async function index(request, response) {
    const posts = await Post.find();
    response.writeHead(200, { 'Content-Type': 'application/json' });
    return response.end(JSON.stringify(posts));
}

// Returns a specific post as JSON
async function show(request, response, postId) {
    const post = await Post.find({_id: postId});

    // Let the user know wether we found what was asked
    let code = 404;
    if(post.length > 0) {
        code = 200;
    }

    response.writeHead(code, { 'Content-Type': 'application/json' });
    response.end(JSON.stringify(post));
}

// Persist a new post in the database
async function save(request, response, postData) {
    try {
        const post = new Post(postData);
        let savedPost = await post.save();

        // return the persisted model instance
        response.writeHead(200, { 'Content-Type': 'application/json' });
        return response.end(JSON.stringify(savedPost));
    } catch (err) {
        console.log('Error while saving', err);
        response.writeHead(500, { 'Content-Type': 'application/json' });
        return response.end(JSON.stringify('{error: "Something went wrong"}'));
    }
}

module.exports = { index, show, save };
We did not need to write any database queries. We let the ORM handle all of that and instead just interact with the model class.
Mongoose
Mongoose is popular option for a mongoDB ORM. This course's groupwork will use Mongoose to interact with mongoDB. With Mongoose developers can create schemas to model and validate application data. It includes built-in type casting, validation, query building, and other features.
Above, we discussed how mongoDB is schema-less and how that can be a good thing. Now, we are introducing Mongoose to bring back that schema. The difference here is, that the schema is defined in the code and not in the database level. This makes it easier to alter the schema in production.
Mongoose website has good documentation for building schemas, so I'll skip the basics and instead try to replicate the earlier example of a user model as a Mongoose user model:
const mongoose = require('mongoose');
const { Schema } = mongoose;

// Define the user schema
const userSchema = new Schema({
    name: String,
    address: String,
    hobbies: [ String ],
    blogs: [ { name: String, URL: String } ]
});

// Define the user model
const User = mongoose.model('User', userSchema);

// Start the application
main().catch(err => console.log(err));

async function main() {

    // Wait for connection, use database test
    await mongoose.connect('mongodb://localhost:27017/test');

    // Hydrate a user model with instance values
    const Brandon = new User({
        name: "Brandon Walsh",
        address: "7 Alden Drive, 90210, LA",
        hobbies: [
            "Altruism",
            "Good morals",
            "Producing"
        ],
        blogs: [
            {
                name: "The Bewerly Beat",
                URL: "...",
            },
            {
                name: "The Jet Set",
                url: "..."
            }]
        });

    // Persist the model instance in the database
    Brandon.save();
    console.log("Saved");

    // Fetch and print all model instances
    const users = await User.find();
    console.log(users);
}
Running this code should persist and then retrieve the model data. Try it out like this and then try to remove one of the fields and add a new one. This should still run and the persisted model should loose the removed field. But the extra field should not be persisted as it is not part of the schema.
If we persist a model instance without all of the fields defined in the schema, we might end up in trouble when trying to do something with that data. Because of this, we need to also add validation to our schema.
Mongoose Quick start: http://mongoosejs.com/docs/index.html.
| Extra: Mozilla Developer Network - Mongoose
| Extra: Native mongoDB validation is a bit more involved process, see mongoDB: Schema Validation
Mongoose validation
Documents are validated before they are saved. This way we can ensure that some fields we consider required are actually present in our data. We can also make sure the data is of certain type, sufficient length, etc.
| Extra: Mongoose - validation
Let's change our user schema to require the name value:
const userSchema = new Schema({
    name: {
        type: String,
        required: true
    },
    address: String,
    hobbies: [ String ],
    blogs: [ { name: String, URL: String } ]
});
... and prepare to present an error message if the value was missing and the save failed:
user.save(function(error) {
    // Error: User validation failed: name: Path `name` is required.
    console.log(error);
});
Validation is a middleware. Mongoose registers validation as a pre('save') hook on every schema by default. But you can also call the validator directly by using user.validate(callback) or user.validateSync().
There are built-in validators. This bit is borrowed from the mongoose documentation:
const breakfastSchema = new Schema({
    eggs: {
        type: Number,

        // Allowed range
        min: [6, 'Too few eggs! Must be at leas 6, got only {VALUE}'],
        max: 12
    },
    bacon: {
        type: Number,

        // Custom error message
        required: [true, 'Why no bacon?']
    },
    drink: {
        type: String,

        // Allowed values
        enum: {
            values: ['Coffee', 'Tea'],
            message: '{VALUE} is not available'
        },

        // Conditional validation rule
        required: function() {
            return this.bacon > 3;
        }
    }
});
For example, all SchemaTypes have the built-in required validator. The required validator uses the SchemaType's checkRequired() function to determine if the value satisfies the required validator.
Storing passwords to a database
Storing passwords is an activity riddled with danger. You might think that it's not that bad if one account is compromised and that your systems does not hold any such sensitive material that would be really bad to leak. But then you are forgetting, that people are lazy and will use the same email+password combo everywhere and your data may be the key for attackers to get into much more sensitive information. This is why storing passwords safely is such a big deal: the ramifications of data breach could very well be catastrophical.
Let's assume, that someone manages to steal our data and can try to extract the passwords. This is known as offline attack against compromised/exfiltrated data.
Step 0: storing passwords in database as is
This is the easies solution. You save passwords as any other data. This also allows you to send your users their passwords if they forget them. What a good service - no need to keep creating new passwords when you forget the old ones! No. Loosing this data would be like loosing a universal key along with every security system pin. Or worse.
Now our data might look something like this:
| Username | Password |
|---|---|
| johndoe | iAmBatman |
| janedoe | ICP4life |
| alice | dontpwnme4 |
| bob | dontpwnme4 |
Step 1: storing hashes
A hash is string of text output formulated from a string of input. Running the hash function for the same text will always result in the same hash and running the hash function on a different text should most likely result in a different hash. And looking at a hash alone, you should not be able to figure out the original text. Hence, it is a one-way message digest. For example, SHA1("The quick brown fox jumps over the lazy dog") would output hexadecimal 2fd4e1c67a2d28fced849ee1bb76e7391b93eb12, but changing a single letter to SHA1("The quick brown fox jumps over the lazy cog") would result in a completely different hexadecimal of de9f2c7fd25e1b3afad3e85a0bd17d9b100db4b3. So, if we store this hash value in the database we can still verify the password the user gives us by hashing that as well and comparing the two hashes together. But we can not return the hash back to its original form.
Now our data might look something like this:
| Username | Password_hash |
|---|---|
| johndoe | 695ddccd984217fe8d79858dc485b67d66489145afa78e8b27c1451b27cc7a2b |
| janedoe | cd5cb49b8b62fb8dca38ff2503798eae71bfb87b0ce3210cf0acac43a3f2883c |
| alice | 4420d1918bbcf7686defdf9560bb5087d20076de5f77b7cb4c3b40bf46ec428b |
| bob | 4420d1918bbcf7686defdf9560bb5087d20076de5f77b7cb4c3b40bf46ec428b |
Looking at the hashes, it seems that alice and bob have the same hash. This means, that they have both selected the same password. Hence, if I know Bob's password, I know that I can log in as Alice, as well. To this application and to all other applications, where the users use the same password.
How to extract these passwords?
Well, we know that running the hash operation on the same text will always result in the same hash. So, what we can do is run that hash operation on every string and then compare the hashes to find what string caused it. This is a brute force attack. Calculating hashed of every string (up to some maximum length, of course) will take a lot of time and will result in a very large file, which is why a smart cracker will simply download a pre-computed database of hashes. In the most simple form a pre-computed hash looup table to the length of 8 could look like this:
| Key | Hash of that key |
|---|---|
| a | 86f7e437faa5a7fce15d1ddcb9eaeaea377667b8 |
| b | e9d71f5ee7c92d6dc9e92ffdad17b8bd49418f98 |
| c | 84a516841ba77a5b4648de2cd0dfcb30ea46dbb4 |
| ... | more lines here |
| aa | e0c9035898dd52fc65c41454cec9c4d2611bfb37 |
| ab | da23614e02469a0d7c7bd1bdab5c9c474b1904dc |
| ac | 0c11d463c749db5838e2c0e489bf869d531e5403 |
| ... | many, many more lines here |
| zzzzzzzz | fd15e5dc45839815c6465b7b7e60728057c5af3f |
But since time and space are limited, the attacker might not want to compute every random string and will instead just use a dictionary or a list of most common passwords from a list of pwned data. Of course, many users won't make their passwords out of random characters, but rather some text, like password or p4ssw0rd. Then, you can just use a dictionary of words, leetspeak, and common passwords, and generate the hash lookup table much faster. A dictionary has a lot of words, sure, but still a lot less than off possible string permutations of equal length and faster CPUs and GPUs, as well as distributed computations, make this relatively easy.
| Extra: Wikipedia - Cryptographics hash function
If you look at the sample hash lookup table, you might think that adding uppercase letters, numbers, and special characters in your password requires the attacker to generate a lot more permutations. And you would be right, but that is not the whole story. What if the website instructs the user with this common message:
- The passwords needs to be at least 8 characters long
- The passwords must contain an uppercase letter
- The passwords must contain a number
- The passwords must contain a special character
What this is, is extra information for the attackers. With this information, they can reject all permutations that are less than 8 characters long, do not contain an uppercase letter, a number or a special character. The password will have an uppercase letter. A number. A special character, most likely. For many people, at least. This means we have a lot less permutations to compute. Now, don't get me wrong, this kind of a password is still better than a short, common word. But if you really want a good password, there are two key ingredients: length and avoiding common words. If we know that the password is at least 16 chars and that we cannot use any dictionary, the number of possible permutations starts to be astronomical.
Step 2: salted hashes
If we add a salt to our hashes, that makes using precomputed tables useless. Unless someone has made a table for that exact salt.

Let's say a user picks as their password ICP4life. We add salt (some random string, e.g., jug4l0s) to this, for example by always appending it to the front of the string (e.g., jug4l0sICP4life), turning the hash different, and hence make precomputed tables useless. When the user tries to login, we just add the salt to that input as well, and copare the resulting hash with the one we have in the database.
How to extract these passwords?
If bob and alice keep using the same passwords and we keep appending the same salt, we are only creating longer passwords, that are still not unique in our database. Knowing one password means you can login as any of those users. In this application and in all other applications, where the user uses the same password.
If the attacker also acquires the salt we have used, they can then just generate a new hash lookup table for our site. It will be extra work, sure, but not impossible.
Step 3: unique salts
Let's add more data to our user model. When we hash and save a passwords, let's also generate some unique salt for the hash and save that as well. Now our data might look something like this:
| Username | Salt | Password_hash |
|---|---|---|
| johndoe | xu63 | 695ddccd984217fe8d79858dc485b67d66489145afa78e8b27c1451b27cc7a2b |
| janedoe | yh34 | cd5cb49b8b62fb8dca38ff2503798eae71bfb87b0ce3210cf0acac43a3f2883c |
| alice | assa | 77b177de23f81d37b5b4495046b227befa4546db63cfe6fe541fc4c3cd216eb9 |
| bob | 987d | 73fb51a0c9be7d988355706b18374e775b18707a8a03f7a61198eefc64b409e8 |
Now, if two or more users choose the same password, the different salts will make sure we still get different hashes. Looking at the data we cannot know if any of the passwords are the same. If we have good, long, random salts (longer than in this example), the attacker would have to generate hash looup tables for each salt and only get one password for each table. It's still not safe, but at least it is not easy to crack.
How to extract these passwords?
By generating hash lookup tables for each user individually. Still possible, but would take a lot of work.
Step 4: increase work
Hashing algorithms are designed to fast. Normally, this would be a positive thing, but it also makes generating hash lookup tables too feasible. Cryptographic algorithms such as bcrypt can be used to salt and hash passwords using strong cryptography. With those, you can increase the amount of work it takes to hash a string. If the login takes 1000ms because we made it purposfully slower is not necessarily a terrible thing. But if generating each hash for a hash lookup table takes 1000ms, it is no loger possible to generate them in the quantity needed for cracking.
| Extra: bcrypt - Wikipedia
Step 5: 2 factor authentication
There are many ways to implement 2fa, but the important thing is to require two different pieces of data, such as a password AND a one-time code; password AND a mobile app; password AND a one-time use link in email, etc. We cannot cover everything in this course, however.
Step n: don't store passwords?
Do you really need to store passwords? Does your application really need passwords at all? If you choose to store passwords you need to also take care of:
- Hashing and salting
- Enforce quality of passwords?
- Allow for resetting forgotten passwords
- Allowing users to update their passwords
- Extra layers of security to make sure it really is the user trying to change their password
- Enforce uniqueness of username/email
- Still allow for changing of username/email
What other strategies are there for authentication?
- Access delegation (let someone else worry about credentials)
- Passwordless access
- Generate a one-time-use time-limited link and send it to the users email, for example
- Can you think of others?
These are way outside the scope of this course, but you should be aware that defaulting to storing passwords is not the only way and it might not be the best way. Especially if you are not 100% sure you know all the dangers.
Summary
As the client is taking a lot of responsibilities, it needs a way to store data. It also makes sense to have client-side storage as (especially mobile) devices may lose internet connection abruptly. For server-side storage, it sometimes makes sense to store JSON-like objects in NoSQL databases instead of transforming everything into rows and columns, like with SQL. But with the freedom of schema-less NoSQL databases comes the responsibility to enforce schema yourself. Tools like mongoose help with validation and schema-checking.
But no matter what database you have, storing passwords is something not to take lightly.